Coffee and Thread Blog Tour – Spring 2017

Hi there!  Welcome to the Bonnie and Lottie stop of the tour.  I can’t believe that there are only 4 more days left in the tour!?  How did the time fly by so fast?

If you are like me you have been absolutely stunned and impressed with all the amazing bloggers and their beautiful makes.  I can tell you that I’ve been so impressed with these amazing makers!  So here you are today . . . crossing my fingers that I don’t disappoint.

I’m so happy that Olga of Coffee and Thread decided to host a blog tour and even more excited to be invited to join!  I’ve had my eye on The Antalya since it released and have had a couple of fabric combinations set aside just for it.  I love the built in options for color blocking in this design.  Also the unique design of the side panels really drew me in.

 For the fabric I used cotton woven by Michael Miller from the Into The Deep collection.  I struggled with finding just the right trim along the bodice.  I’m just so happy with this cotton lace I eventually found.  (My secret . . . Daiso for the win.  For those of you that don’t know it’s a Japanese dollar store.)
antalya front
As a happy coincidence, the trim matches perfectly with the lace zipper that I had on hand.  I absolutely love the back view of this dress.  The only modification I made was to turn the bias binding inside the bodice.  I only did this because I thought that my print was a bit too detailed to sustain another color/print.
DSC_7161
Other than having to curve the trim around the side panel, this is a super easy sew.  Also, no sleeves!!!  The side panels are the sleeves!  The dress is a nice roomy fit, and B loved it right away.  In fact she’s still wearing it after the photo session.  She does like dresses but she usually wants to change out of them and back into leggings as soon as she can.
To be honest, I was planning on making the gorgeous Polina for my little in some Wonderland that I’ve been coveting.  However, life happens and time ran short.  More than that, I was so envious of all the beautiful Ania Tunics I’ve seen on the tour.  I just had to jump in!
Ania
 I’m so glad that I did!  I used a bit of Les Fleurs by Cotton and Steel for the pockets and kept the selvage on the top.  The colors just happened go so well together.  We don’t have cats, and I’m slightly allergic to them, but B loves them so much.  So at the very least, I can let her wear them on her clothes.
ania back
B’s hair is getting so long and tends to get wrapped up in button closures.  I’ve even had to cut off strands that I was completely unable to untangle.  So for the back of my Ania, I modified the back closure to use ties.  In order to do this I thought about using bias tape around the neck line but ultimately decided against that because I didn’t want a stitch line around the neck.  Instead, I lined the bodice with the same pieces and caught the ties between the lining and the main.
 ania front 1
Thanks for stopping by and checking out my makes.  Don’t forget, Olga is offering a generous 20% discount for the blog tour followers.  The code is “Coffeeandthreadtour”.  There is also a giveaway in the link at the end of this amazing line of bloggers!

April 3

Enjoyful Makes || Idle Sunshine || ZowieZo Handmade || Angie BurgettApril 4

Handmade Frenzy || Replicate Then Deviate || Fairies, Bubbles & Co || Coral + Co

April 5

Made By Sara || Naeh-Connection || The Bag of Unexpected || Circle Meets Line

April 6

Skirt Fixation || Sewing Like Mad || Hello Holli || Buzzmills ||

April 7

Little Cumquat || Thread Bear Garments || Pearl Berry Lane || Plus 2 is 5 || Sew Chibi 

April 10

Stahlarbeit || Knee Socks and Goldilocks || Bonnie and Lottie || Sew Sophielynn 

April 11

Mouse House Creations || While She was Sleeping || Mix it Make it || By Dagbjort 

April 12

Gaafmachine || Beletoile || LBG Studio || My Cozy Co  || As It Seams

April 13

Moineau & Petit Pois || Just Add Fabric || Sweeter Than Cupcakes || Frances Suzanne || Sew Liberated 

April 14

Stitched Together || S is for Sewing || Boevenbende || Lafolie Sewing Booth || Sew Pony ||With Love By Eva 


Don’t forget to enter the awesome giveaway!

a Rafflecopter giveaway

Sewing for Kindergarten!

Hi there!  Thanks for joining me on this stop of the Sewing for Kindergarten sewing series. There are so many amazing bloggers here, I feel so special to be included.  Head over to Sewing like Mad to check out the other inspiring stops!  Wait, don’t go yet!  I haven’t shown you the outfits yet!

sfk2016-participants600px

My inspiration for my creations is actually from my kindergarten-er herself.  Like her mom she is a huge fan of prints.  Unlike her mom, she is brave enough to sport her prints. Sometimes all at the same time.  It makes for some interesting combinations.  With this in mind, I decided to make  coordinated outfits.  The only restriction I had was with regards to the school dress code.  I’m not going to get into that but these outfits are school “appropriate” and yet I managed to exhibit her style.  At least I hope so.  I’ll let you be the judge of that.

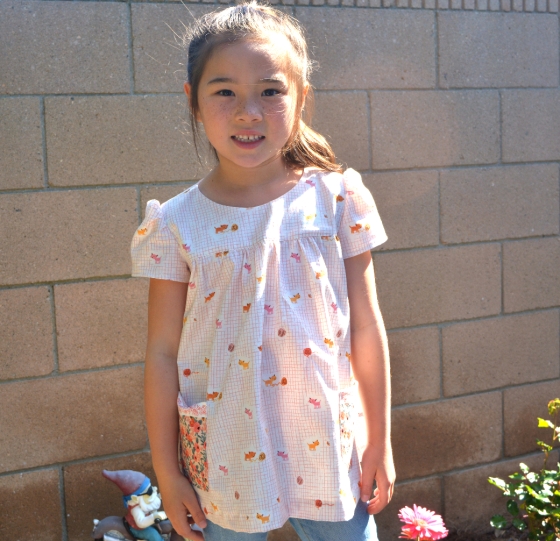
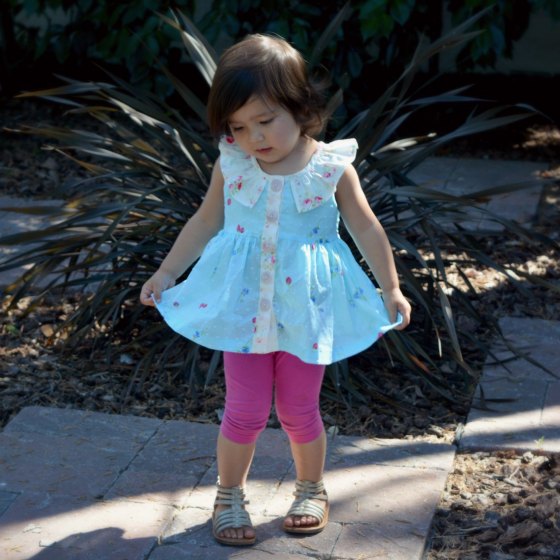
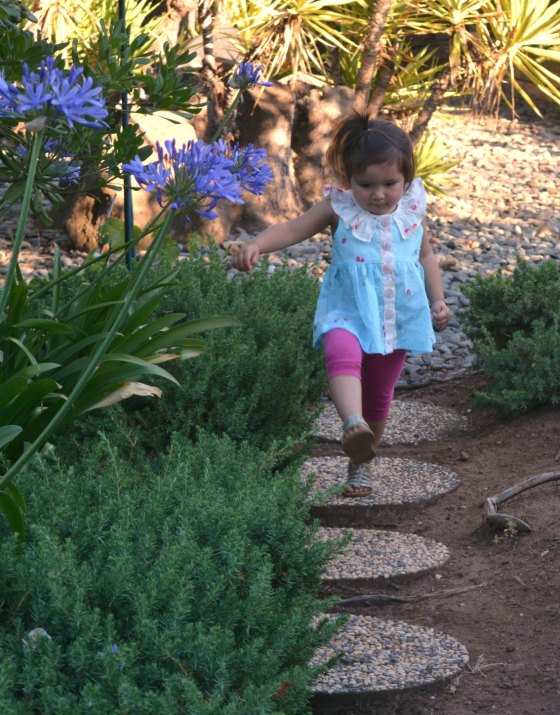
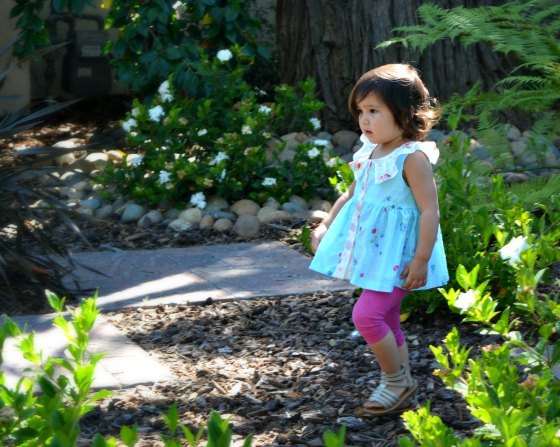
First up is this short sleeve + shorts combo.

dsc_5962

Here she is modeling how she posed for her school photos.  I thought it was most appropriate for this series.

dsc_5977

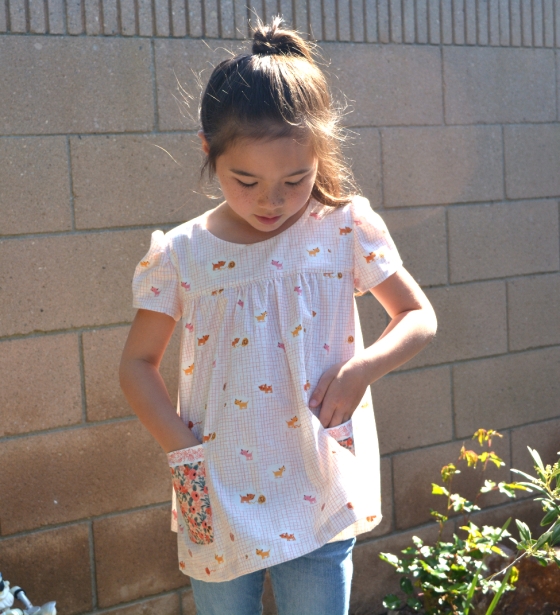
The top is the Glass Onion Top by Shwin Designs.  The neckline is designed to be finished with facing but in my experience with my wiggly child, facings tend to pop out.  Additionally, B is not a fan of seams so I try to make clean finishes where ever possible.

dsc_5986

The details of my hack:

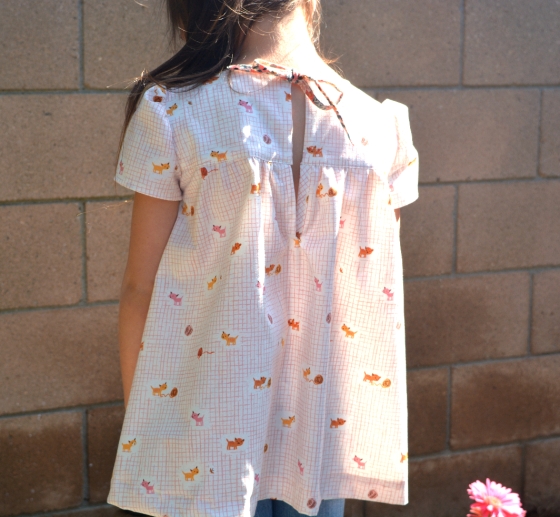
I modified with a narrow bias tape to eliminate the need for the facing.  I cut on the bias with a 1″ width and pressed one side up.  The unpressed side was sewn around the neck line right sides together.  Then I folded the bias tape over to the inside with the pressed fold hiding the raw edge.  I contemplated sewing down the tape with my machine but wasn’t excited about how that would look in the back.  I was concerned it would screw with the beautiful pleats in the back.  So I hand stitched the tape down.  I know, Blech.  But it was worth it I think.


dsc_5966

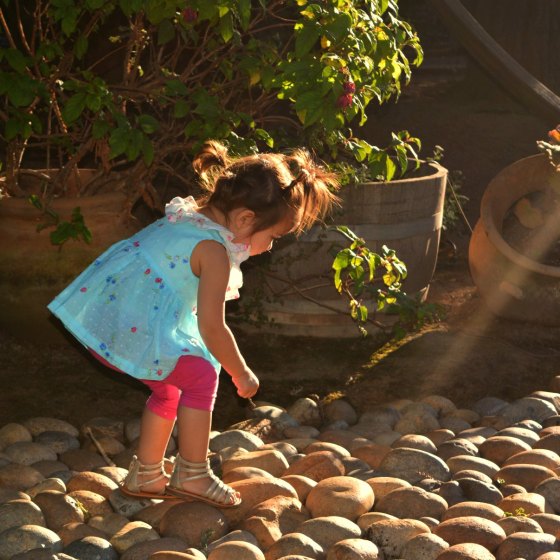
The fabric is Cotton and Steel which is simply amazing to work with.  My favorite part of the pattern is this back.  The cap sleeve are pretty darn cute too!  The best part in B’s view, no neckline seams AND no fasteners (buttons/zippers/hooks) to deal with.  It just pulls over her head.

Now for the shorts.  Oh these shorts!

dsc_5971

I don’t know why I only have this one close up photo of these shorts.  But I love them so much!  I used a linen and a lace trim.  Can you see the scalloped waist band??  It also has good sized pockets.  It’s a flat front waist band with elastic in the back.  The Papillion Shorties pattern was created by Jessica and Angie of Lil Luxe Collections.  Seriously, I’m in love with these.  I have 2 more planned.

Next up, a more relaxed casual feel because my B is all about comfort. I think C will be different.  She wore a pair of ballet flats that rubbed her feet wrong and she refused to take them off because they were “princess shoes”.  B wore those shoes for all of 5 minutes and refused to put them on again.  Funny how kids are so different!

dsc_6229

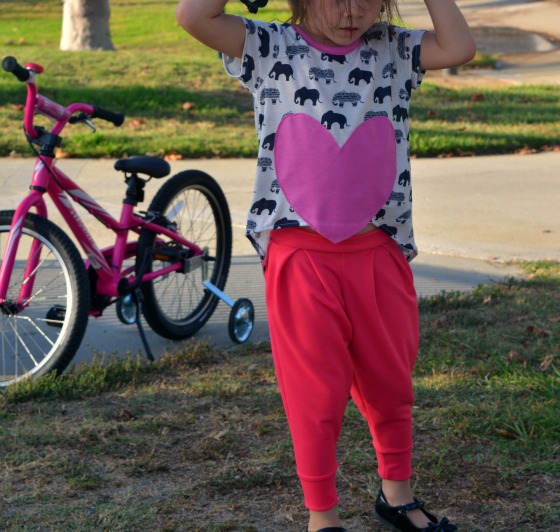
This is the comfy knit outfit.  The top is the Mini Briar by Megan Nielsen.  The only modification is that I put an interfacing under the heart so that it would be sturdier.  The jersey knit was too thin and I had nightmares of the middle of my tee getting chewed up by the feed dogs.

dsc_6091The Mini Briar has a beautiful curved hem that was a gentle enough to turn up and hem easily.  I just serged the edge, turned it up and top stitched it down.

The Joggers bottoms are by Cali Faye.  I really love the pleats in the front.  The next one I make though, I think I will take out the pockets or have to under stitch them because they keep poking out.  It may have been because of the fabric I used though.  It was almost as thick as a scuba.

dsc_6205

dsc_6184

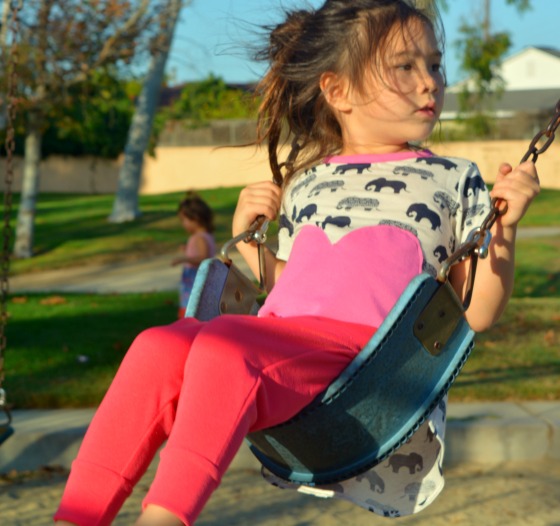
I am a huge fan of the shape of the joggers and the look of the wide cuff.

Third up is the picture day outfit.  It’s the Emma’s Herringbone pattern by Simple Life Pattern Company.

dsc_5949

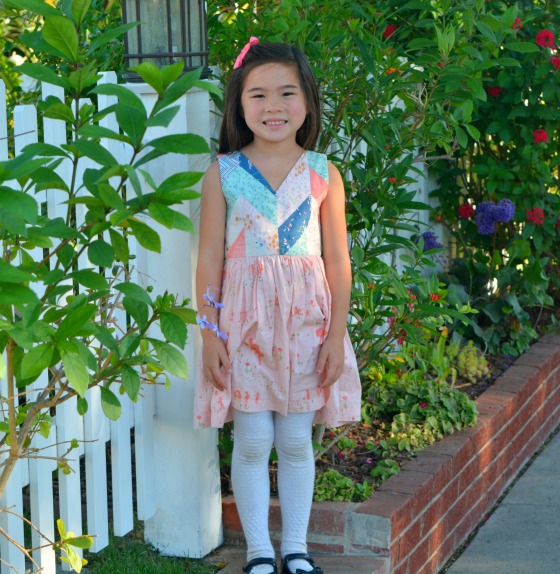
Surprisingly, piecing together this bodice didn’t take as much time as I thought it would.  It also inspired me to start on another quilt.  Which will get finished. .. someday.

dsc_5953


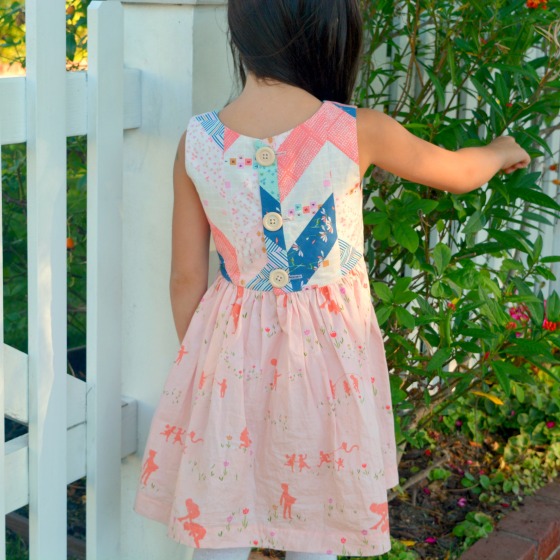
The only modification I made on this pattern was that I hand stitched the bodice lining down around the waist.  Also, I used a French Seam along the sides of the skirt.  So the dress is as pretty on the inside as it is on the outside.  I’m excited to see how the school photos turn out.  Last year when B was in transitional kindergarten I completely forgot about school photos.  So this year I am starting with a win! hahhaa.

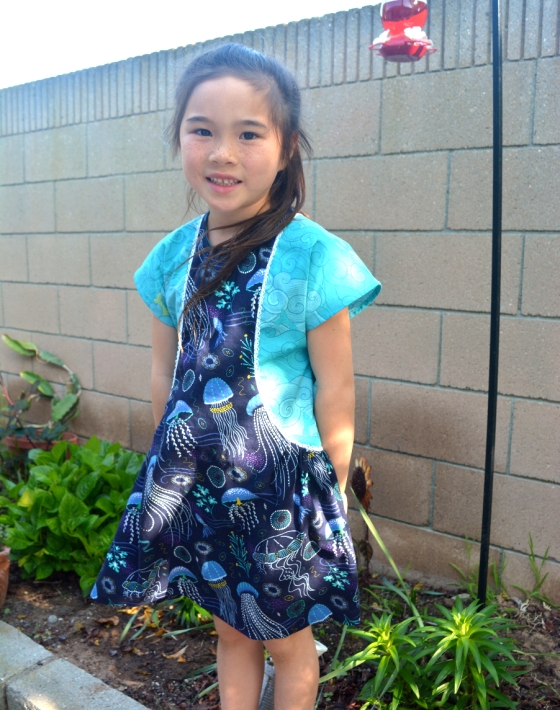
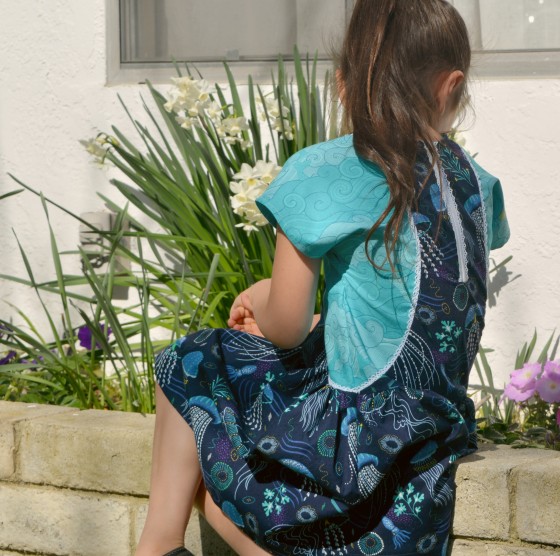
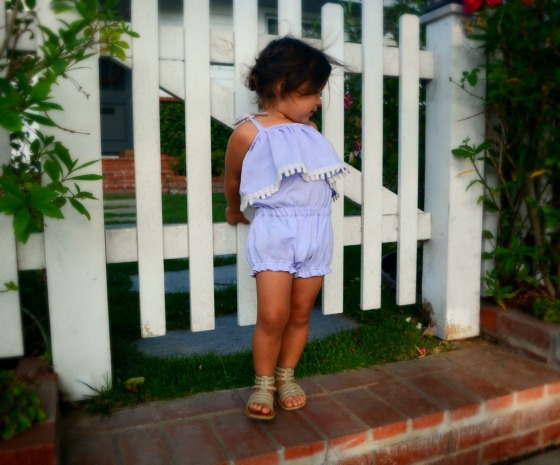
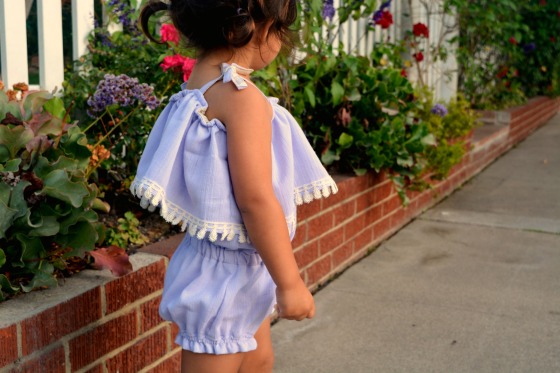
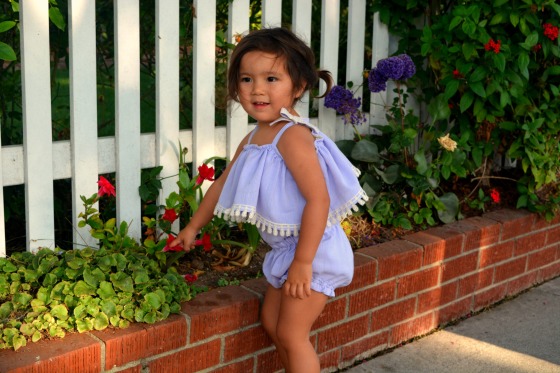
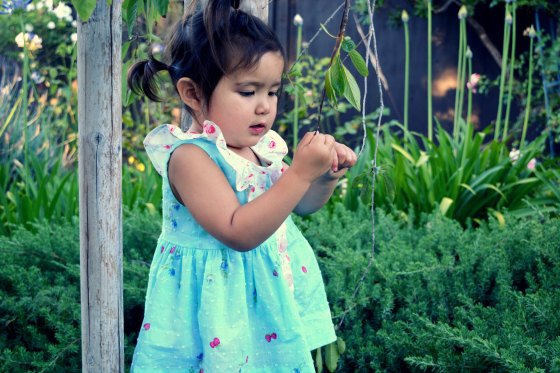
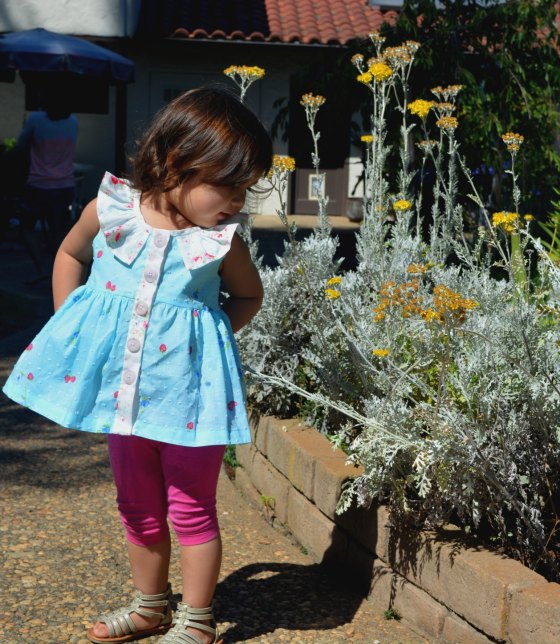
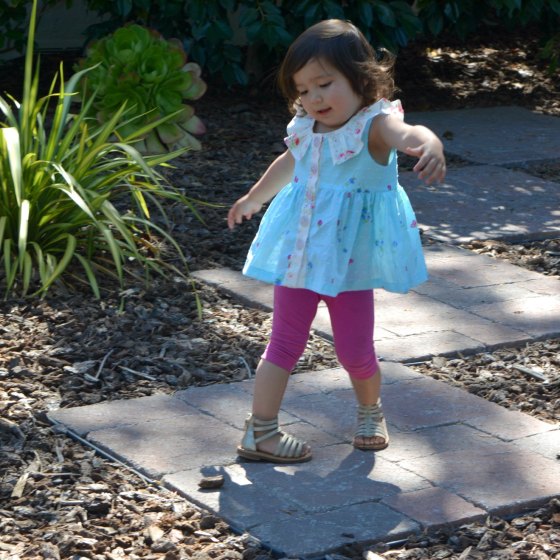
Last, but not least, no school wardrobe is complete without a pinafore.  In my mind at least!  The Pembridge Pinafore is probably my favorite pattern of the year.  It’s another creation by Lil Luxe Collection and it’s the perfect blend of modern and vintage.

dsc_5873

So this outfit is a bit of a cheat because it’s actually from a pattern test.  BUT, I planned it with thoughts of school in mind.  B loves wearing dresses to school.  The top under the pinafore is a modified alley cat romper.

dsc_5876

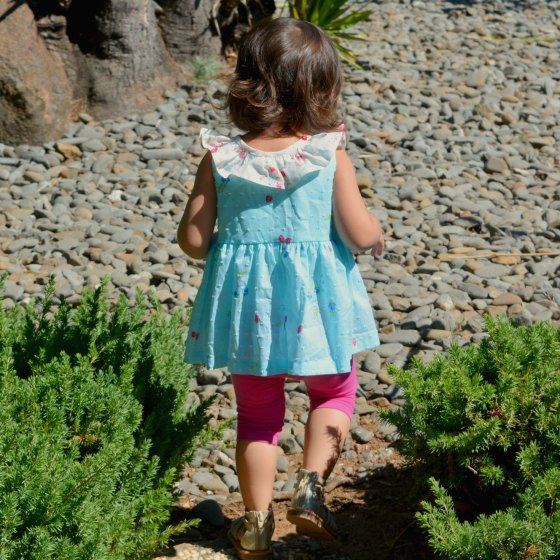
The back waist has elastic and the straps can be either be crossed or just straight back.

dsc_5855

I hope you enjoyed the outfits!  I certainly had fun putting together this mini wardrobe.  It was a great kick in the butt to get going on her school clothes.  She recently had a growth spurt and everything is getting too small.

I’m so happy school has started.  It’s really nice to have a normal regular schedule again.  Since I work 4 days a week, it is hard to juggle all the different summer camps during the summer.  Thankfully my parents have been an ENORMOUS help!  I could not have survived this summer without them.  THANKS MOM!  I think that this transition into kindergarten has been easy for me because last year B was at the same campus going to transitional kindergarten.  They play in the same yard and know all the teachers so she didn’t have any nerves going into the year.  B is most happy that she has one of her best friends in her class and is already fond of her teacher.

Don’t forget to head over to Sewing Like Mad to catch the rest of the series!  Thanks for having me Mie!

Sun-Kissed Sunsuit

Fall is supposed to be approaching us as we are back in school.  However, here in drought ridden LA, we are still feeling the heat.  I’m sure you aren’t feeling too bad for us!  😉

At any rate, it’s a good thing we are still in the middle of summer weather.  This is because I have an adorable sunsuit romper to share.

DSC_5841

This dreamy pattern was cooked up by Bella Sunshine Designs. This versatile pattern can also be a dress, maxi, or a halter top, all with or without a ruffle flounce. I chose the ruffled romper with the snap bottom because I really love rompers on a toddler/preschooler, but I need quick diaper/potty time.

DSC_5782


The ruffle is so float-y and lovely.  It’s also perfect for embellishing.  For this flounce I chose to use use lace and have it hang over the edge of the ruffle.  I really love the look of the lace trim for this romper.  One of the testers used poms and it was simply adorable.

DSC_5814

The bottom legs of the romper has a ruffled edge that is actually easier than it looks to construct.  The only issue I had was my own doing.  The fabric looks soft and gauzy when in fact it is actually rougher than expected.  I cut the pattern piece for the leg band in half lengthwise and added 3/8 SA.  Then I cut out the main piece (the scratchy fabric) and then the softer lining fabric.

DSC_5806

I did the same for the straps as well.  The bodice had a facing, so I was able to just cut the facing from the lining fabric.  I think this worked since my daughter told me that her romper felt soft like a pillow!  It’s more work but wouldn’t you do anything for this little face?!DSC_5820

I’m happy that C will be able to keep wearing this for a couple of months.  After that I think I might cut off the bottoms so she can still wear the top under a little cardi.  Sometimes I’m sad that she’s my last baby and that I won’t have little to sew for.  But then I look at my 5 year old who is coming into a fantastic era of self-sufficiency and I really can’t imagine going backwards.

Here’s to cherishing the time I have now!


Monarch Top by Lil Luxe Collection

When I blog, I post multiple entries in an evening. 😀

I was so lucky to get the chance to test the Monarch Top by LLC.  This is a stunning top is classic in its beauty.  It features a lovely ruffle collar, and stunning button placket.

DSC_4702

If you just extend the skirt, you can easily turn this top into a dress. (Edited to add that the pattern includes the skirt dimensions for a dress)  After I make one of these tops for B, I’ll be making dresses for both girls too.  Check out the stunning button placket!

DSC_4584

Here’s a view of the back of the top as well.

DSC_4589

The baby blue fabric is from Joann’s.  It’s similar to a swiss dot.  Even better, I found it as a remnant.  The collar is a floral by Lucien.

DSC_4688

C is a huge fan of the top as well.  She twirls around it in and claims to be a princess.

DSC_4617

DSC_4626

The neck line is finished with bias tape and the skirt is installed by sandwiching it between the bodice and the bodice lining.  The skirt is a french seam.  If you hand stitch the neck line and the button placket like I did, there are no raw edges!  Making the top a comfy pattern to hop in…

DSC_4709

To explore in..

DSC_4645

To collect rocks in . . .

DSC_4661

AND to look fabulous in!

DSC_4611

I think this photo is probably my favorite of the set!

The pattern is on sale now for a limited time.  Head over to http://www.lilluxecollection.com to pick up your copy before the sale is over.

Maker’s Tote for Travel

It’s been far too long since I’ve blogged or posted.  Don’t worry I’ve been busy sewing like crazy behind the scenes.  What’s that old saying about a duck, calm on the surface and paddling hard under water?  At any rate, I have felt underwater!

With a trip coming up on the horizon, I wanted to make sure the girls would be well entertained and busy while traveling.  My first priority was to have a bag that could store all the activities and toys that I planned to make/buy.  After the list grew to over 7 items per kid, I realized that I need a bag with LOTs of pockets.

While thumbing through IG, the Maker’s Tote by Noodlehead popped up.  I fell in love with the bag immediately and decided that it would be the perfect bag for the girls.  Picking the fabric was the fun part.  I already had this gorgeous Alice in Wonderland print that I had planned to turn into a bag for B.  I also had a cute panda print that would be ideal for C.

DSC_4728

Then I just had to find coordinating prints for the pockets.  I thought of using a deep purple for B’s tote.  But B loves colors and pink so I went with a vibrant pink for the bias binding and pink hearts for the lining and the pocket.  I found this adorable bunny key chain at Daiso (Japanese Dollar Store) to use as a zipper pull.  I wish it was a white rabbit to go with the bag theme but this pink one coordinates well.

DSC_4730

Now for a look at all the goodies packed inside!

DSC_4736

I should have taken more photos of the inside of the bag without all the toys, but I’m a bum and I’m not going to.  I will say though, I love love love the pockets on the inside!  There are four pockets, 2 pleated pockets and 2 slip pockets.  The main fabric I used for the pockets are from a scrap pack that I purchased from @Llamafabrics on IG.  Maybe later when I’m not being such a bum I’ll take some photos of the lovely cotton and steel fabric.

My guess is that the doll probably catches your eye first.  🙂

DSC_4735

This adorable little doll is from a cheater doll kit that is already printed onto the fabric.  The fabric is by Stacy Hsu for Moda.  The fabric panel also has directions for sewing up the doll.  I only changed how I sewed the skirt.  The instructions has you created a casing around the waist band and using a tie to fasten the skirt.  I chose to put elastic into the waist band and use french seams for the sides.  The doll as a blanket, wolf friend, cape, skirt, and a pillow.  I’m hoping that B’ll have fun tucking the doll in and playing with her accessories.

DSC_4733

In addition to the doll, there are a ton of other goodies; a container of bitty plastic animals, a magic ink Dory coloring book, 1 blank notebook, 1 lined notebook, 3 ink cartridge pen, cracker snacks, lollipops for takeoff and landing, and colored pencils.  Where are the colored pencils?

DSC_4734

Ta-Dah!!  I made a bag for them.  These are thick short pencils from Ikea and the plastic container that it comes with was too bulky to use in the bag.  This was my first crack at the idea.  The bag is fully lined, which makes me happy.  My husband drilled a hole into the pencil sharpener so I could tie it to the bag to keep it from getting lost.  It’s so nice to have such a handy husband.  Thanks honey!

Now for all the fun in C’s bag.  Check out the panda zipper pull and the leather strip zipper pull.  It was slightly difficult to pull through, but if you trim the leather strip at a diagonal you can wiggle it in.

DSC_4729

Now for all the toys!

DSC_4737

C has a bit more toys because the iPad doesn’t hold her attention as well.  So she has; a mermaid doll and accessories, a container of bitty aquatic animals, matching shape cards, lacing cards, 2 notebooks (blank and lined), fish stickers, snacks, pompom stuffer/sorter, ribbon felt caterpillar, and colored pencils.

The doll has a skirt and a mermaid tail.  Again, I used the elastic in the waistbands, and french seams for both the skirt and tail.  She has an adorable little sea horse buddy as well.

DSC_4745

The ribbon caterpillar and the pompom stuffer were ideas that I saw on pinterest.  You thread the felt squares through the buttons attached to the ribbon.  The pompom stuffing toy was also an assist from my husband.  He helped drill holes into the butter container.  The plan was to paint the lid white and the edges of the holes the color of the pompoms so she can sort.  I might still do it but I might be travel kitted out now.

DSC_4740

The colored pencil bag was my second go at it so I also interfaced the fabric and slightly curved the edges of the flap.  It’s still fully lined.

DSC_4741

If I have time, I’ll make boxy bags for the dolls and their accessories.  I have a feeling I’ll be chasing all the doll accessories if I don’t have a special bag for them.

And that’s it!  If you made it this far, hope you found these bags and their toys interesting!